Friday, June 25, 2010

Artist Intro - Jack Spinks


This week, we'd like to introduce Jack Spinks.  Jack is an accomplished metal-smith, who happens to prefer working in Sterling Silver.  Most of his pieces are hand-fabricated.  However, he also likes to use unusual casting methods, like broom-straw casting and ice-casting to create unusual and natural shapes to serve as his starting-point or platform for his creative processes.
How did you get started in jewelry-making?
I got started when my eldest son was about to ask his girlfriend to become his wife. I had been buying old antique silver rings and she had really liked one I had given her as a gift. My son wanted something unusual but was on a budget.  He found one of my rings that was unusual and asked if I could get it re-sized.  I found few jewelers that wanted to touch silver so I pulled out some books, read up on it, and taught myself silver-smithing by resizing that first ring.  Of course he then wanted to replace the stones with darker amethysts and I found a 1 ct Songea Ruby from Tanzania to set in amongst them.  Much more effort on that first ring than I would have to spend now but the results were worth it since the young lady is now my daughter-in-law. 

What is your favorite medium or technique?
Probably my favorite style is filigree in conjunction with large stones.  I note that most folks only wear costume jewelry in plastic due to the high cost of genuine stones.  I often obtain 10 to 100 ct stones and mount them on filigree and put relatively low prices on them.  Mostly I just sell the silverwork and the stone goes for only slightly over what I paid for it. Thus average people can afford really impressive jewelry. 

What has been your most satisfying moment as an artist?
Not sure if that was my daughter-in-law's ring, or when I remarried a couple of years later and my fiance told me to get to work and make our wedding rings.  We still get comments about the fact they are an unusual style and I have recently made rings and wedding jewelry for several friends and relatives that have gotten married.  Very satisfying when you deliver and see faces light up with surprise and appreciation.

What has been your most challenging skill to master?
The most difficult technique has been learning to cut my own faceted stones and devise suitable mountings for them.   Being able to cut my own stones specifically for sparkle has been rewarding in that several have been mistaken for diamonds and it drastically enhances the appearance of the piece.  The most difficult silver technique has been without question the making of Mokume Gane which I use for pendants in designs not commonly available. 

How much time and materials are required to complete a typical piece?
I don't think I have an average time to complete since I rarely do the exact same item twice but it rarely takes under two hours to complete an item, sometimes as much as a day.  I only gain time when I am making what for me is a production run.  Then I may make 5 or 10 basic shapes prior to customizing each one with different designs and stones.   

Monday, June 21, 2010

Artist Intro - Marvin Glasgow

Marvin Glasgow is an avid amateur Archeologist.  He usually donates time each summer to help in archeological "digs".  He builds clay bowls in the traditional coil-and-pinch method, and has spent a lot of time learning to create stone tools and weapons.

How did you get started in Native American Reproductions?   
I hunted for arrowheads before I became a teenager.  Over the years places to hunt became overgrown or off limits.  I then started knapping, sporadically, about 20 years ago, but when I retired 7+ years ago, I seriously returned to flint-knapping more frequently, attending workshops and spending more time improving my techniques. 


What is your favorite medium/technique?
I like knapping Obsidian (volcanic glass) more than any other material.  It is easier to knap than flint, and the finished product is more colorful and unique. Since Obsidian is not available locally, I purchase it thru E-Bay, where it comes in saw-cut slabs of different sizes. Occasionally I will use colorful fiber optic glass to make arrowheads.

What has been your most satisfying moment as an artist?
There has not been one moment that stands out by itself.  There are many moments that make me feel real good, like when I make a really unique point, or when I demonstrate the skill to school children and see their amazement.  Other times are when I teach someone how to knap and they become good knappers themselves.  Perhaps the most flattering moment is when a professional Archeologist ask my opinion about an artifact and how it might have been made.  I once made a point that was so good and authentic looking that I was asked where I found it, not "did you make this?"

What was the most challenging skill to master?
To be able to make a complete blade that is thin, wide and long without breaking it.  My record right now is 8 1/4"+ by 1" wide by 1/4" thick.  Then I add the handle, which can be up to 5" long.


How much time and materials are required to complete an "average" piece?
If I take a large piece of flint, perhaps one I have picked up in a dry river bed, it can take 3 - 5 hours to make a blade or point, depending on how the flint chips when I work it, the point or blade style, and  how long the blade will be.  That process takes percussion to remove the excess material, then pressure to finish the item. If I make a small arrowhead from a flake, then about 15-20 minutes, depending on how pretty I want it to be.  If I use a saw-cut slab, it takes me about 3-4 hours to complete a blade, depending on the length and style.  Arrowheads I can usually make in under 2 hours (from a saw-cut and shaped slab).  If a person is thinking about picking up this hobby, there is a saying among flint knappers that "it takes desire, patience, and a ton of rock to learn to make arrowheads successfully."  By the time you have broken a ton of rock, you have become a pretty proficient knapper, and can probably start teaching others the hobby.


On 19 June, Marvin gave a demonstration on flint-knapping at Crystal Moon Gallery.  We all learned quite a lot during his visit:

Since neither high-grade flint, nor obsidian are common in North Texas, Many natives in the North Texas area would work with whatever stone had good fracture characteristics.  Ancient arrowheads have been found knapped from fossil (aka petrified) wood, Quartzite, Flint, and Chert.

As an example, Marvin showed how a large river-rock of coarse Chert could be subjected to percussion flaking (hit it with a rock!) to test its quality:
In most cases, our native cousins would not want to carry a river-rock back to camp.  So, they would typically reduce the stone down to a 'quary blank':
The 'quarry blank' removes most of the exterior part of the stone, and has hopefully eliminated any fracture-prone areas.  This piece is about an inch thick and about 8" long.  At least half the original stone has been removed.  Later, when they could take their time, they would use pressure-flaking to thin and shape the blank into something like this:
The shape is beginning to look familiar, and the stone is now only about one-half-inch thick.  If they were interested in making a weapon, the final product might have been refined into something 1/4 to 3/8 inch-thick which would be attached to a handle:

Wednesday, June 16, 2010

The Nature of Made-by-Hand


Among the challenges of living in a mass-produced, consumption-driven society, is a decline in appreciation of individual creativity.  There is wide preference for a large amounts of cheap "stuff" as opposed to satisfying needs with high-quality and carefully created items.  One of the most glaring examples we see in our gallery are the pens painstakingly created by Ann Hast.  Each of her pens requires about 3 hours of her time to create...plus the cost of materials.  Prices for Ann's pens start at about $35...certainly a reasonable price for 3 hours of time and creativity.  But, we are constantly reminded that a perfectly functional (machine-produced) pen can be purchased for less than $1.

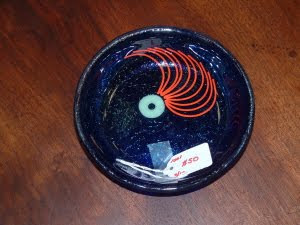
Another example is the stunning glassware produced by Phylis Denton.  It takes Phylis several hours, and a number of steps to create each of these, using high-quality glass, and very specialized equipment.  Functionally, they serve the same purpose as glassware that may be purchased for about $5-$10 at high-volume retailers.

In a prior post, we spotlighted Rebecca Glasgow's oil paintings, and the 100+ hour labor of love to create them.

The items being created by Artists and Artisans are rarely necessities-of-life.  But, they bring color and value to our lives.  Wouldn't it make sense to fill one's life with  a smaller number of unique artist creations, rather than a large number of mass-produced items?

See us at crystalmoongallery.com

Sunday, June 6, 2010

Oil Painting - Making Mom's Biscuits

Rebecca Glasgow is a painter, and artist at Crystal Moon Gallery.  In an effort to help people to understand art, we had asked her to provide us with a synopsis of her creative process.  We were wowed with what she provided.  If you have any interest in how hand-painted art is created, you should enjoy the following narrative. See her work at crystalmoongallery.com
------------------------------------------------------------------

After painting a kitchen still life entitled, “Making Mom’s Brownies,” I decided to paint a series of “Making Mom’s ____ “  since I enjoy painting and cooking and have happy memories of my mom and me in the kitchen together when I was a kid.
 This painting, “Making Mom’s Biscuits,” will be the second in the series.  The next one will be “Making Mom’s Apple Pie.”

My mom was a great cook and a wonderful person.

PHOTO Dates and Notes:

1.   1-22-10  After numerous arrangements, this is the setup I selected for “Making Mom’s Biscuits” which was set up on my dining room table in front of a large window.  I did add extra light to emphasize the cast shadows for the painting.  All the other work will take place in my studio.

2.  1-28-10   Here is my drawing of for the painting on newsprint.  I rarely use a grid for drawing, but decided it would speed up the process and help ensure I had all of the items in the correct alignment.  However, even when using a grid, adjustments must be made. 

3. 4.  5.  2-2-10   I then transferred the drawing to a wood panel that I had prepared by putting several coats of gesso on it and sanding between the coats.

Here are several photos showing progress of the underpainting.  The drawing is very pale.  I like doing an underpainting in an acrylic monotone in order to get the values down correctly.

6.   2-16-10   I did not have a photo of Mom cooking and holding the “big blue bowl.”   I had a friend of mine pose for the photo; but used mom’s face of course. (photo missing)

7.   3-5-10  YEAH!!!   I have finished the underpainting!   Now the most fun starts – applying paint!
 
8.   3-11-10  I have applied the first thin coats of glaze (thinned down oil paint).   

9.    3-11-10  I have toned down the yellow background moving it towards a calm shade of burnt sienna, added highlights to the sifter and intensified the colors on the flour sack and rolling pin, etc.  Also worked on the bowl inside and outside shaping it with shadows and highlights.

At every painting session, whether underpainting or afterwards I make technical adjustments as needed, i.e., ovals are ovals, angles are correct, shadows are dark enough, highlights are light enough, etc.

10.  3-28-10  I have made additional adjustments including, intensifying highlights and darks inside the bowl and on the baking powder can, adjusted the color of the rolling pin. I have not painted the words “Baking Powder” yet- I don’t like painting words (especially since my handwriting and printing aren’t great). 

11.  4-2-10  I have added color to the table as well as made other modifications.

12.  4-29-10   With additional highlights, adjusting the background color, and finally painting the “Baking Powder” words, I have finished the Painting!  Yeah, I have finished it and framed it after 138 hours!! 

Saturday, June 5, 2010

Judging Antique Age - Glass

Welcome to Crystal Moon Gallery's first Blog. We hope to use this forum to educate and inform. And, we hope that you will find it useful.

Perhaps as an out-growth of the rapid advancement of technology in recent history, it seems that many people make some erroneous assumptions about the age of antiques. An example of this was a gentleman I recently overheard stating that a piece of furniture could not date from the 19th century, because beveled edge mirrors hadn't been invented.

Glass (and by extension, mirrors) have a fascinating history. Archaeologists know that glass-making was well-established in Egypt by about 1500 B.C. And, we know that glass was greatly advanced by the ancient Romans. Through the middle-ages, glass sheets were generally formed using centrifugal force to spin a disk of glass. The glass disks could then be cut into useful shapes, but the glass was found to be thicker as one approached the outer rim of the disk. Imperfect glass eventually came to be ground manually on a flat abrasive surface.
  • Small sheets of glass were then assembled into window panes by use of wood, lead, or other connective materials. And, eventually led to "stained glass" techniques.
  • Once the techniques of grinding glass were established, it was only a matter of time before they were used to decorative effect. So that beveled glass appears about mid-way through the 17th century. 
  • The Glass Press was invented in 1827, allowing glass to be formed in a mold.
  • Glass Rolling machines came into common use in the mid 19th century, and allowed production of continuous or nearly-continuous sheets of glass. However, these machines tended to embed bubbles in the glass, as well as imparting a somewhat "wavy" surface.
  • Cylinder-formed glass was created about 1900, and eliminated most of the undesirable qualities imparted by rolling machines. 
  • And, while wavy glass is generally considered an attribute of 19th century glass, truly (optically) flat glass only became widely available in the 1950s. 
We hope you find this useful. Please remember that any technology older than "today" can be replicated. So, the absence of modern technology cannot prove age. But, the existence of modern technology can definitely disprove a claim to age.

See some of our antiques at crystalmoongallery.com

David Abbott